Introduction
Recently, a colleague asked for assistance in AWS Web Application Firewall (WAF) in that the Web ACL rules were not applying properly. The scenario was to look at allowing only trusted IP addresses and blocking others. They started with a default Web ACL and created a rule that blocked their IP address to mimic a bad actor. Traffic still flowed to the CloudFront distribution and backend successfully.
How could this be?
To find this out, we first need to unpack what WAF Web ACLs are, how they work and what the default handling behaviour is. We will also need to dive into a little IPv6 to understand how this affects rules and connections between IPv6 sources and destinations. We will also discuss some useful resources to get you rapidly skilled in WAF and implementing DDoS Protection for all your web workloads.
What Are WAF Web ACLs?
A WAF Web ACL is a policy containing rules and actions matched against various conditions. Conditions when matched have an action to Permit, Deny, Count, CAPTCHA or Challenge. In addition to the specific action of what to do with the traffic, there is also an option to modify the response to the action such as a custom response. Web ACLs are associated to various public resources to provide protection using the rules declared in the Web ACL. Where regional resources are deployed, the Web ACL must be deployed into the same region as the resource. Resources for regional Web ACLs include:
- Amazon API Gateway REST API
- Application Load Balancer
- AWS AppSync GraphQL API
- Amazon Cognito user pool
- AWS App Runner service
- AWS Verified Access instance
NOTE: Web ACLs cannot be applied to HTTP API Gateways as they do not support advanced features like REST API’s do.
A second type of Web ACL is created as a Global resource for association with CloudFront distributions. CloudFront distributions cover global regions and can be limited to regions within various geographical continents. Global Web ACLs can only be associated with CloudFront distributions.
What is the default behaviour of Web ACLs?
The default action for Web ACL’s (in contrast to services like Identity Access Management or IAM) is set to ‘Allow’ for all traffic not matching any Web ACL rules. This behaviour is known as “blacklisting” – where only bad traffic is stopped. This matters as any traffic is allowed through to the associated resource if no traffic is matched. This means that matched pattern traffic is usually set to ‘Block’ in the rules (so only the good traffic is allowed).
What if, though, you only want specific traffic to be allowed in and all other traffic to be blocked?
A single action (Permit, Block, Count, CAPTCHA or Challenge) is applied to all traffic matching conditions in a rule. Thankfully, you have control over the default action for when no rules match. This allows for an alternative view from “blacklisting” to “whitelisting” – where you only permit the traffic that matches the rules. The behaviour changes when the default rule is changed from ‘Allow’ to ‘Block’. The rules associated with a default Block action only need to be set to Allow as the catchall default rule blocks any unmatched traffic.
What about the rules themselves? How do they work?
Rules can come in the form of managed rules to match on specific application exploitations, or you can build your own rules with your own defined conditions and actions. A Web ACL can contain a combination of these rule types. There is a catch though. Rules are provided with a limited number of associated Web ACL Capacity Units – or WCU’s. Managed rules have pre-allocated WCU’s and vary based on the number of match conditions complexity. The maximum WCU’s per Web ACL is 5,000. The pricing model really ramps up beyond 1,500 WCU’s.
Custom rules
Custom rules which contain a single condition can be created easily in the visual console. Complex rules are considered those that have more than one match condition and these can only be configured using the JSON editor. There are three rule types:

To match based on IP addresses – you first need to create an IP set. An IP set contains a list of matched IP addresses in CIDR format and supports either IPv4 or IPv6. This means you need two individual rules to cover IPv6 and IPv4 sources. This is an important distinction we will come back to later.
Using the Rule builder type, we have the following options where it can be a regular rule or a rate-based rule for rate-limiting requests to prevent resources being hit with Distributed Denial of Service (DDoS) attacks:
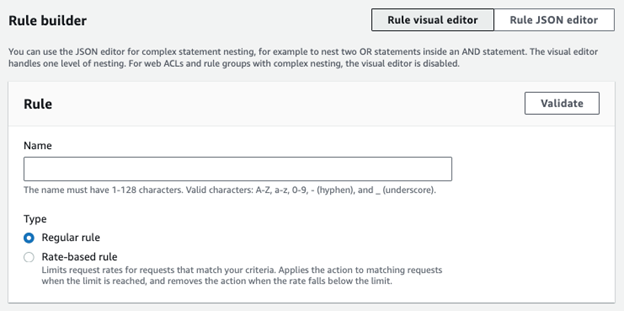
We then have different match statements where we can match a statement or utilise conditional match logic (AND, OR, NOT):

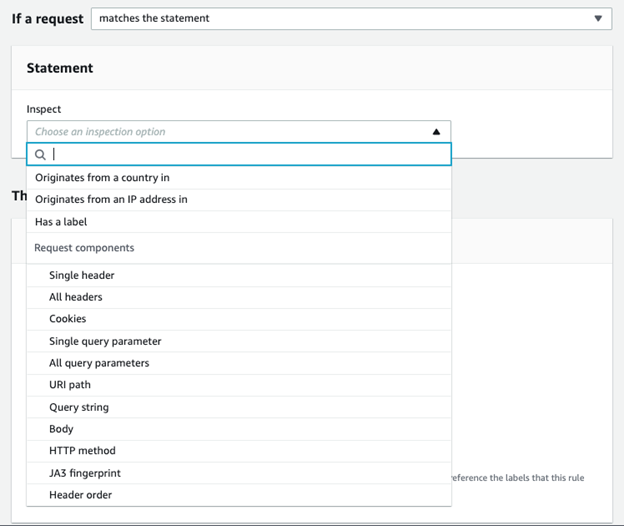
For inspection, we then set the match condition where we can match on country of origin, IP addresses from an IP set or label. We can also match on several request components relating to the traffic or request itself such as headers:
Let us talk about IPv6
The IP address universe is comprised of several classes of addresses covering Unicast, Multicast, and Classless Inter-Domain Routing (CIDR) classes across two families called IPv4 and IPv6. There has been much progress made by AWS in support for IPv6. Many public services (including CloudFront support IPv6). When a source is an IPv6 source, and the destination supports IPv6 – communication uses IPv6 to communicate between source and destination. The source and destination could also be running a “dual stack” where both IPv4 and IPv6 are being used.
Unlike IPv4 which requires Network Address Translation (NAT) to translate private IPv4 addresses to a public IPv4 address, IPv6 individual resources have a globally unique address they use as a source. With IPv4, the NAT public IP address (designated as a /32 or single IP address) can represent an entire network of hosts or sources. An ISP will typically provide a single /32 public IPv4 address (or in a large organisation, a block of several public IPv4 addresses when supporting more than 65,534 hosts – the maximum number of supported hosts per-IP address with NAT overload).
With IPv6, an ISP will generally assign a /64 address range. Each host on the network will get an IPv6 address from this range on the local network for the first /16 block. Each host will have an IP address from that range and append their MAC address to the last 48-bits of the address to make it globally unique. It uses this address as the source for connecting to IPv6 destinations.
In IPv6, each host is a dedicated source representing a /128 host address. To filter source IP addresses for a network in Web ACL rules where you need to permit all the hosts in a network – use the /64 IPv6 address to denote all hosts. Otherwise, if you need specific hosts, set the /128 of the specific IPv6 hosts. The IP addresses are declared inside an IPv4 or an IPv6 IP Set.
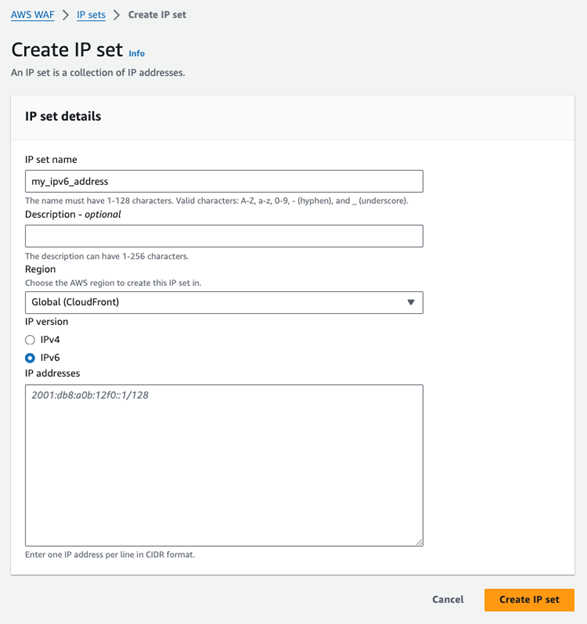
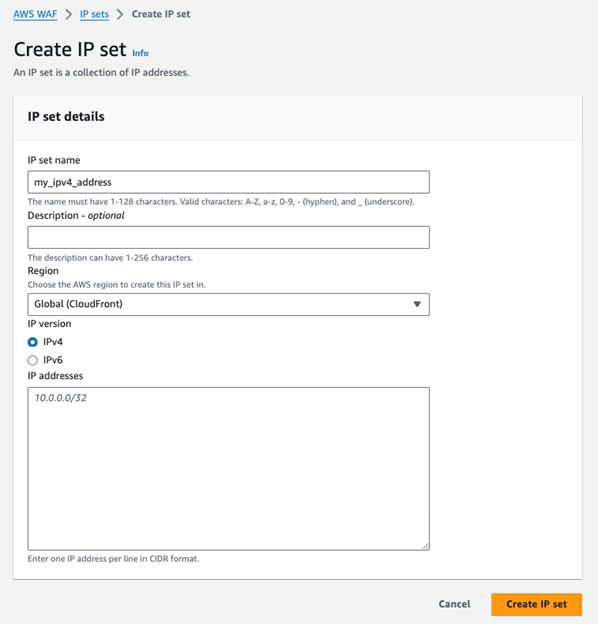
The IP Set is chosen when setting the IP source-based rule.
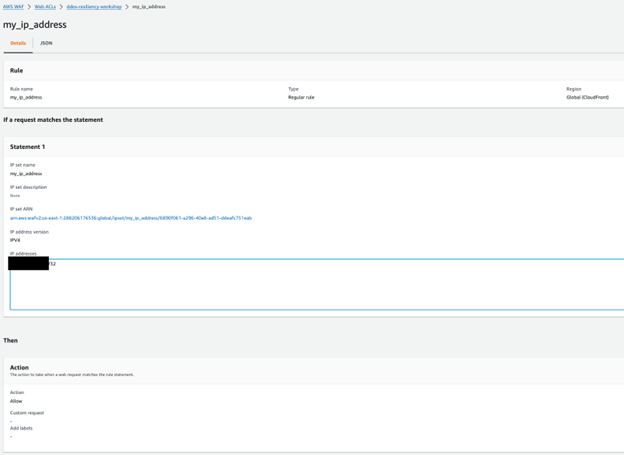
This means you do not need to update the rule if you want additional or to remove allowed IP addresses – you only update the IP Set associated with the rule.
Rule match logic
The actions that AWS WAF applies to a web request are affected by the numeric priority settings of the rules in the web ACL. For example, say that your web ACL has a rule with Allow action and a numeric priority of 50 and another rule with Count action and a numeric priority of 100. AWS WAF evaluates the rules in a web ACL in the order of their priority, starting from the lowest setting, so it will evaluate the allow rule before the count rule. A web request that matches both rules will match the allow rule first. Since Allow is a terminating action, AWS WAF will stop the evaluation at this match and will not evaluate the request against the count rule.
If you only want to include requests that do not match the allow rule in your count rule metrics, then the priority settings of the rules would work.
On the other hand, if you want count metrics from the count rule even for requests that match the allow rule, you will need to give the count rule a lower numeric priority setting than the allow rule, so that it runs first.
When AWS WAF evaluates any web ACL or rule group against a web request, it evaluates the rules from the lowest numeric priority setting on up until it either finds a match that terminates the evaluation or exhausts all the rules.
For example, say you have the following rules and rule groups in your web ACL, prioritized as shown:
- Rule1 – priority 0
- RuleGroupA – priority 100
- RuleA1 – priority 10,000
- RuleA2 – priority 20,000
- Rule2 – priority 200
- RuleGroupB – priority 300
- RuleB1 – priority 0
- RuleB2 – priority 1
AWS WAF would evaluate the rules for this web ACL in the following order:
- Rule1
- RuleGroupA RuleA1
- RuleGroupA RuleA2
- Rule2
- RuleGroupB RuleB1
- RuleGroupB RuleB2
Now we know how things work; we can understand the problem and the solution
My colleague was still able to connect even after blocking their IP address – despite a block rule matching it. The rule was matching the public IPv4 address. The reason for this was the default rule was set to “permit” however the block rule only blocked the public IPv4 address. When the IP Set was modified to IPv6, traffic was successfully blocked. My colleague added a permit rule using the IPv4, however it was still blocked.
The reason for this behaviour is three-fold. The first is that the source address when communicating with the CloudFront distribution was the IPv6 as a preference. This was hitting the block rule. This is the root cause for that behaviour. The second issue was the priority of the two rules hitting the first match which was validated by disabling the IPv6 stack on my colleague’s network interface. The third issue here is the approach taken initially to “blacklist”.
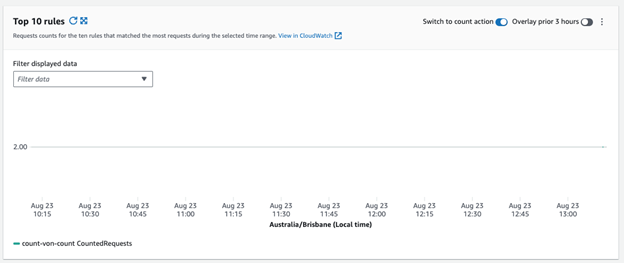
Another related issue was visibility. We could have turned on logging and watched the blocks coming in. This is a start. However, if you want to test a rule first, you can do so using the Count action. The Count action allows you to count the number of matches to a given set of rule conditions. Using Count is a terrific way of determining the validity for match criteria without impacting flow of traffic. You can filter in the dashboard to show Count matches and selectively enable which count rule you want to graph.

Validating the solution
It made sense in the context of the problem to move towards a “whitelist” model. To achieve this, the default rule was adjusted to “block”. We then adjusted the rules to match the adjusted IP Sets to better align towards a more “real-world” case matching a corporate application access pattern. We changed the pattern of behaviour to mimic corporate IP addresses as allowed and blocked all other traffic. My colleague disabled the IPv6 and then created a Count rule with a higher priority (lower number) than the old block rule. Once we could see successful Count rule hits – we removed the Count rule and changed the block rule to allow action.
Useful Resources
Resources that helped gain a deeper understanding of DDoS mitigation and WAF was the Implementing DDoS Resiliency workshop. While the UI is out of date, the clear customer story and scenario-based iteration and explanations were outstanding. I highly recommend it for those looking to get familiar with Web ACLs at a much deeper level.
What is the pricing like?
We talked about WCU’s earlier but what is the cost of running Web ACLs, Rules and Requests?
Resource Type | Price |
Web ACL | $5.00 per month (prorated hourly) |
Rule | $1.00 per month (prorated hourly) |
Request | $0.60 per 1 million requests (for inspection up to 1500 WCUs and default body size*) |
Rule Actions | Price |
Captcha | $4.00 per ten thousand attempts analyzed |
Challenge | $0.40 per million responses served |
Conclusion
The scenario and learning process we went through was an excellent use case for learning quickly, effectively, and gaining deeper understanding of a product’s features. All was validated in a development environment and sandbox and the process was rewarding. Learning new services does not have to be hard. It just requires the right approach. Having a deeper appreciation of the technology used and working backwards from the problem really helped.

Greg has been in the IT industry for 17+ years across a range of roles and specialties starting his career in IT within the Australian Army in the Royal Australian Signals Corps. Since then, he has worked across several industry verticals including Local and State Government, Network Integrators, Gaming, Mining, Private Cloud Providers and AWS Consultancies covering Insurance, Energy, Banking and Airline industries in addition to Public Sector (Health, Transport, Justice, Communities and Child Safety). Greg is an AWS Ambassador and AWS Community Builder for Cloud Operations. Greg specialises in network engineering, cloud infrastructure, governance and compliance, security, cloud operations, AWS Well-Architected and DevOps.


