Overview
In today’s digital landscape, encryption is essential to secure sensitive data, whether it’s in-transit or at-rest. In AWS, sharing an Amazon Machine Image (AMI) between accounts or even to an organisational unit (OU) is straightforward. However, it’s quite tricky to launch the encrypted AMI in Auto Scaling group or any services using service-linked roles. We already know it’s crucial to encrypt your AMI, especially if it contains confidential data. So, this blog guides you through the process of encrypting an AMI, sharing it across accounts, and deploying it with Auto Scaling Groups (ASGs).
In this guide, we’ll walk through the steps to securely create, share, and deploy an encrypted AMI across AWS accounts, specifically for use in an Auto Scaling Group. Here’s what we’ll cover:
- Creating an Encrypted AMI: Encrypting the AMI using a Customer Managed Key (CMK) for enhanced security.
- Sharing the Encrypted AMI: Configuring permissions to allow the target AWS account to access the AMI.
- Deploying the AMI in Another Account: Using the shared AMI to launch an EC2 instance within an Auto Scaling Group.
AWS Account Setup
This setup involves two AWS accounts:
- Account ID: 111111111111 – The source account where the CMK and AMI are created.
- Account ID: 222222222222 – The target account that will deploy the encrypted AMI within an Auto Scaling Group.
Let’s dive into each step to ensure secure and efficient AMI sharing and deployment across accounts.
Part 1: Setting up the CMK in the Source Account ID 111111111111
Start by creating a symmetric Customer Managed Key (CMK) for encryption and decryption. Here’s a quick setup:
Step 1: Key Type and Usage
- Choose Symmetric as the Key Type.
- Select Encrypt and Decrypt for Key Usage.

Step 2: Set Alias and Permissions
- Assign an alias to the CMK, such as blog/cmk-ebs.

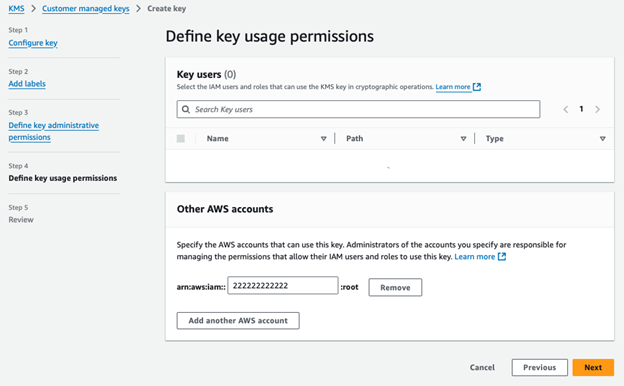
Step 3: Share to the target account
- Add the AWS Account ID of the account you’ll share the AMI with and complete the key creation.
Part 2: Creating the Encrypted AMI
Note: Only AMIs encrypted with or without Customer Managed Keys can be shared across accounts, AWS Organization or even to an AWS Organization Unit (OU), you can’t share the AWS Managed Key to another account.
Follow the Step 3 instruction on this blog on how to launch an EC2 with an encrypted storage or volume. To summarise:
1. Launch an EC2 Instance with an encrypted EBS volume, using the CMK you just created (blog/cmk-ebs)
2. Install Software (Optional): If desired, set up any required software (e.g., Apache) on this instance.
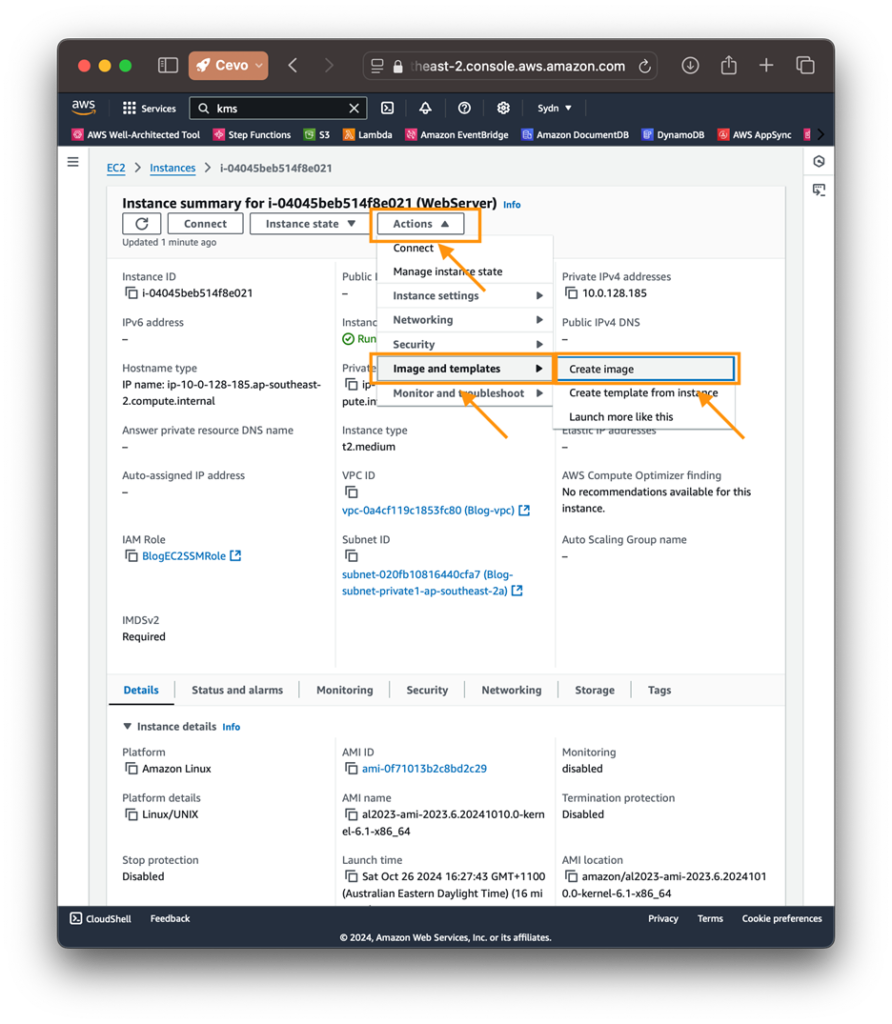
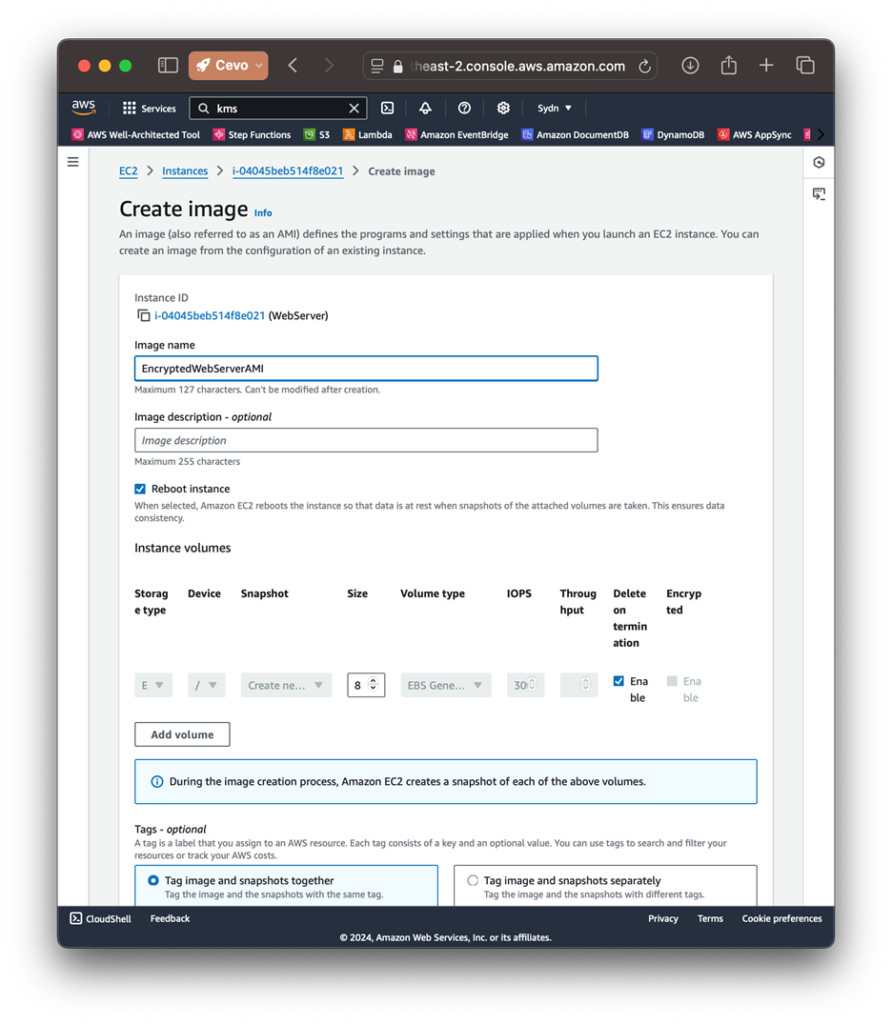
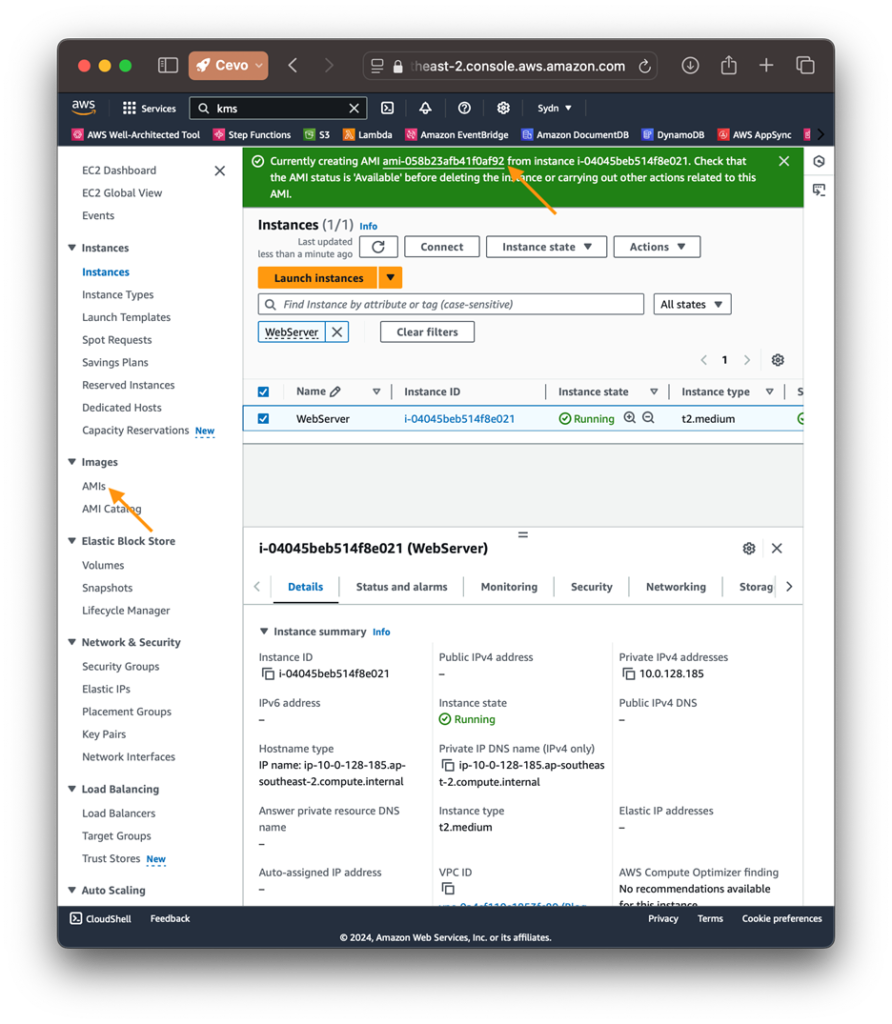
3. Create the AMI: Select the instance, go to Actions > Image and templates > Create Image, and name it (e.g., EncryptedWebServerAMI).
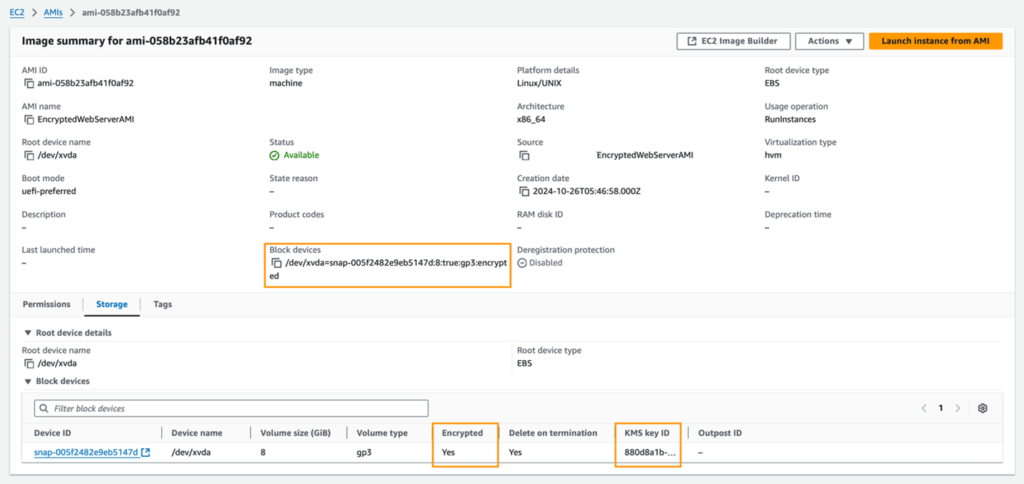
4. Once created, you’ll see that the AMI has an encrypted volume using a KMS CMK.
Part 3: Sharing the AMI with Another AWS Account
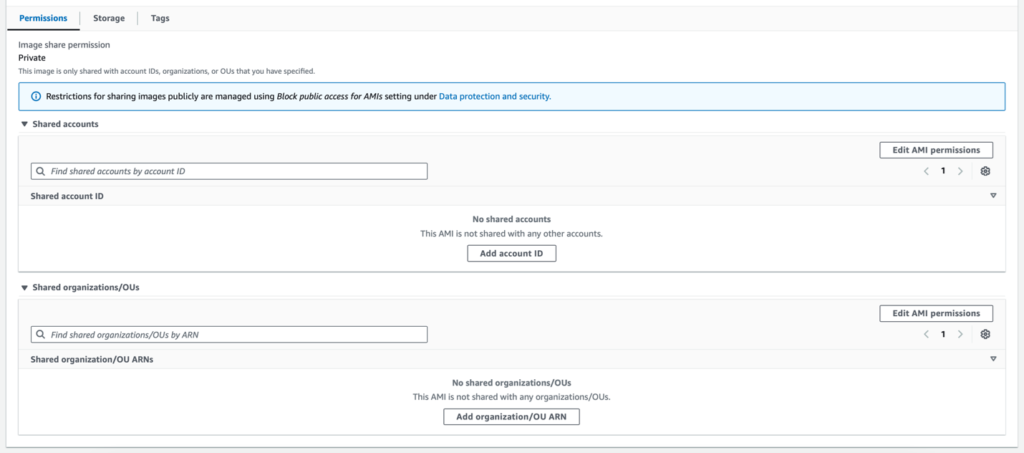
1. Go to the AMI in the AMI Console.
2. In the AMI’s permissions tab, click the ‘Add account ID’ button to open a modal form for entering the AWS account ID. Enter the 2222222222222 account ID into the provided field, then click the ‘Share AMI’ button to close the modal. You should see the entered account ID listed. To finalise the sharing process, click the ‘Save changes’ button.


Part 4: Deploying the AMI in the Target Account ID 222222222222 with Auto Scaling
Now, the target account can access the shared AMI under Private Images.

In the target AWS account, follow these steps to use the shared AMI in an Auto Scaling Group.
Step 1: Create a Launch Template
1. In the EC2 Console, go to Launch Templates and click Create Launch Template.

2. Name it (e.g., EncryptedAMILaunchTemplate).

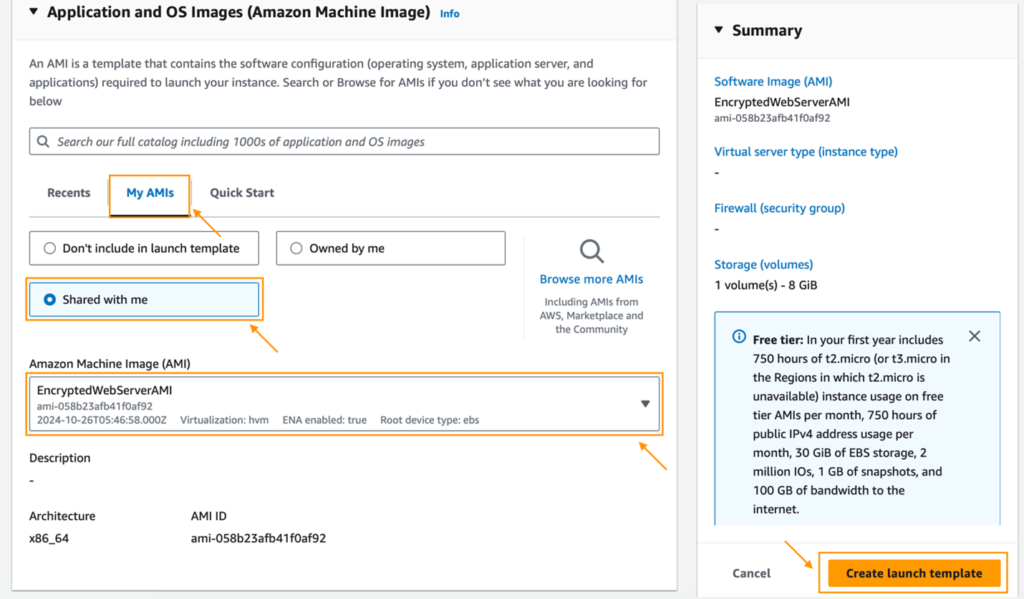
3. Under Application and OS Images (Amazon Machine Image), select My AMIs > Shared with me, and choose EncryptedWebServerAMI.
Step 2: Create the Auto Scaling Group (ASG)
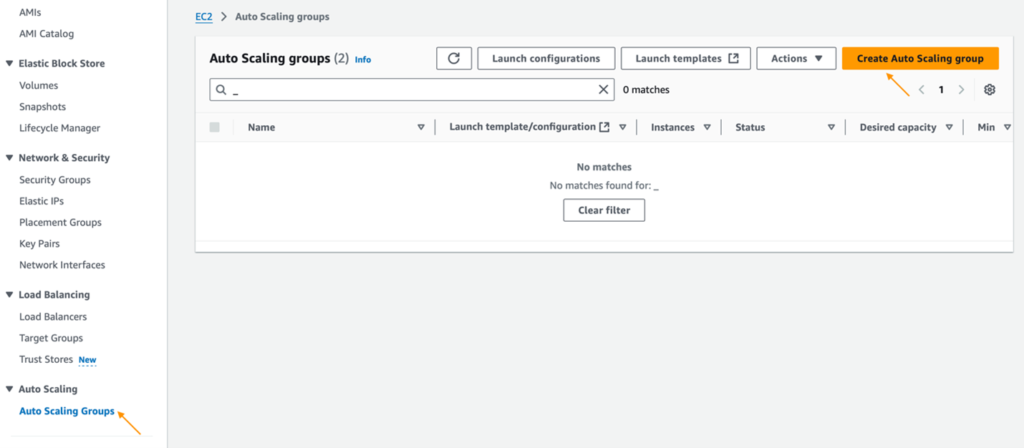
In the EC2 Console, go to Auto Scaling Groups and click Create Auto Scaling group.
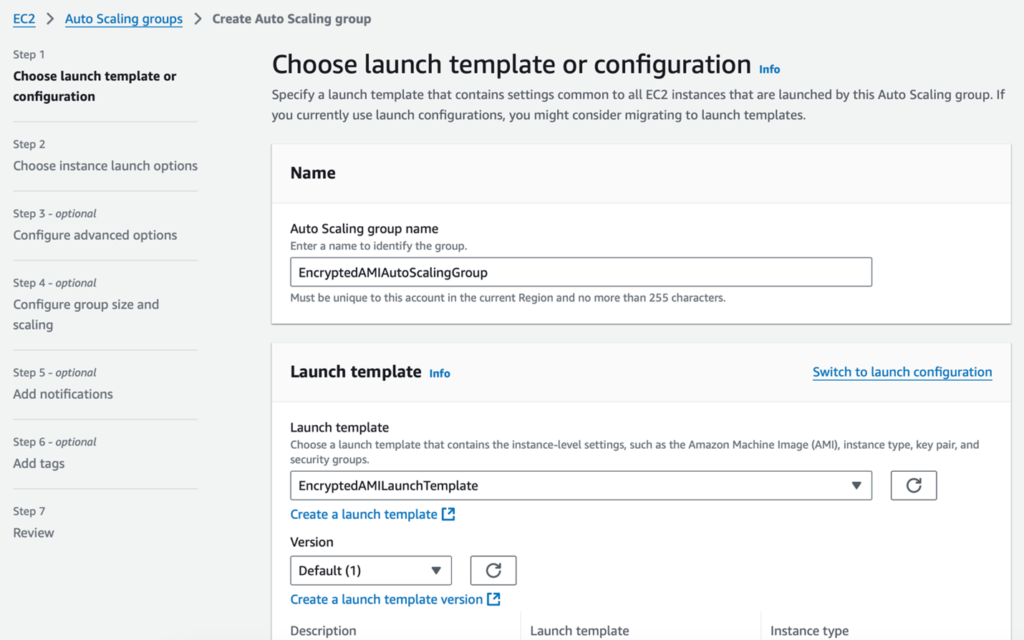
- Assign a name (e.g., EncryptedAMIAutoScalingGroup), select the launch template, and proceed.
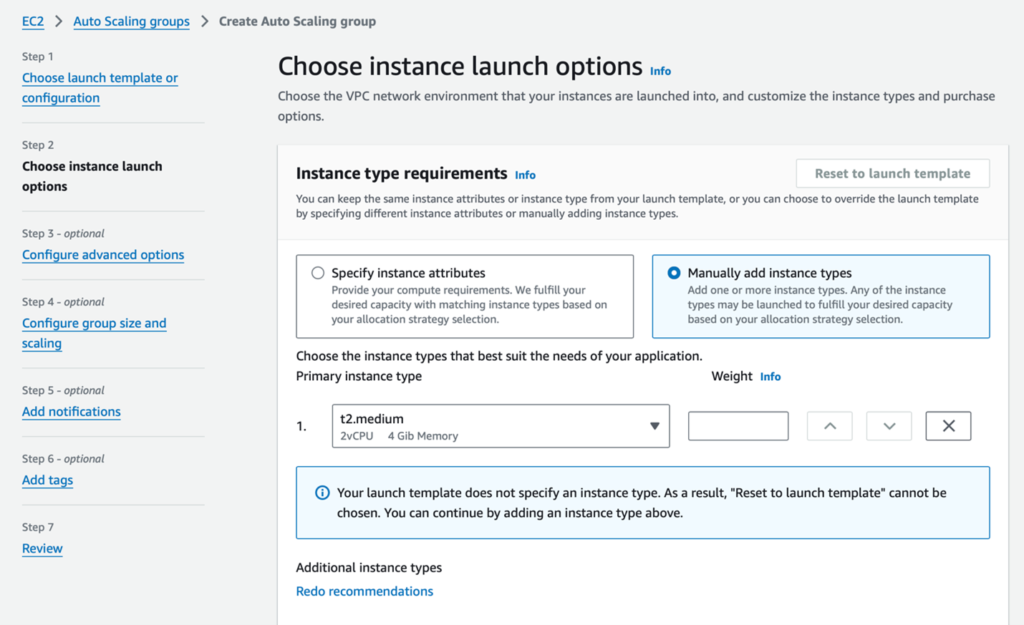
2. Select the Manual option to add instance types, then choose t2.medium as the instance type. Scroll down to the bottom of the page to configure the network settings. [1] See right sizing bastion host considerations.
Select the VPC and subnets where you want your instances to run. Ensure that you choose the subnets that have access to the necessary resources and are configured correctly for your architecture.

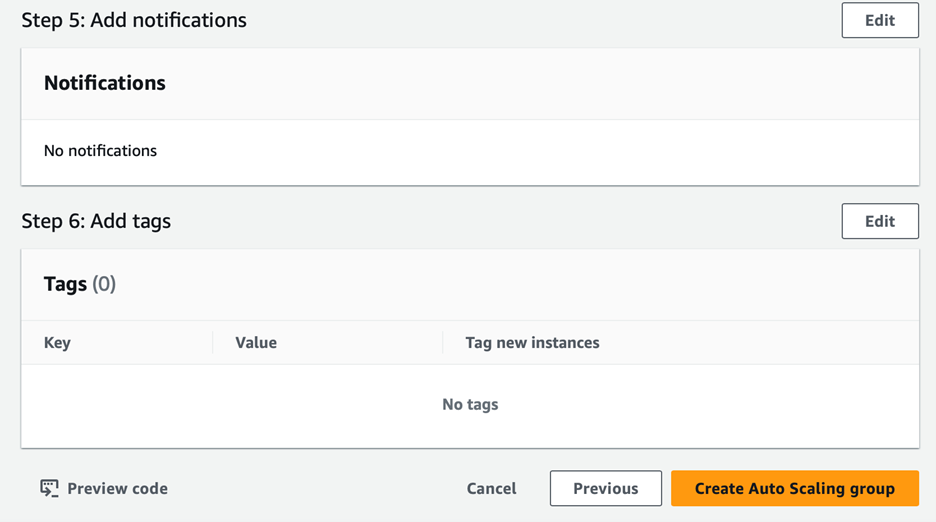
You can skip Steps 3 to 6, and proceed directly to Step 7.
3. Click the Create Auto Scaling group button to finalise the setup.
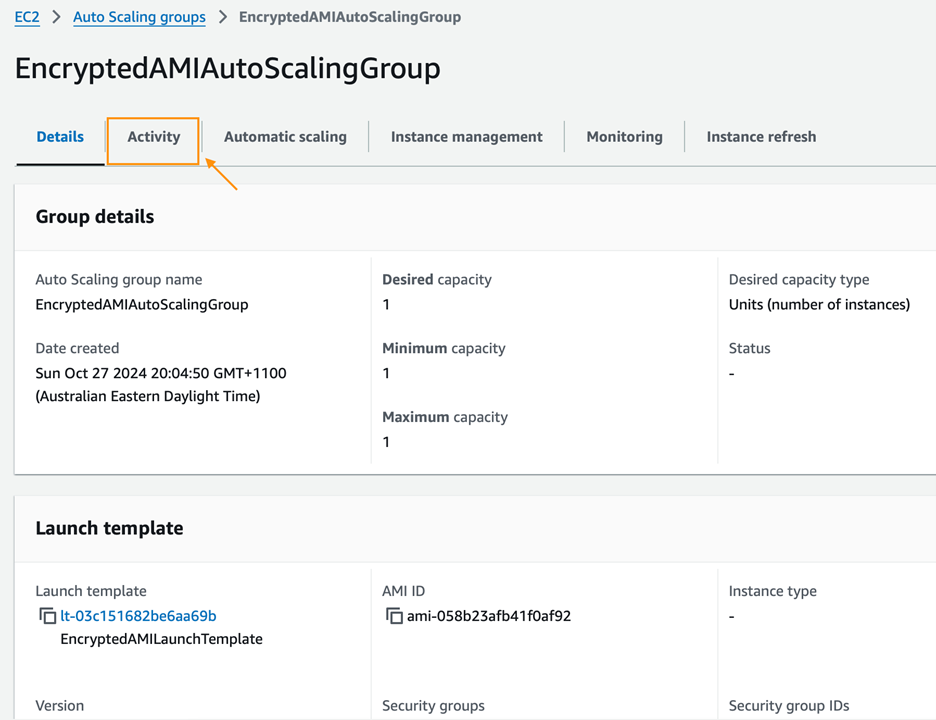
Open the newly created Auto Scaling Group (ASG) and navigate to the Activity tab. After a brief wait, you may notice several cancelled requests due to a KMS (Key Management Service) Client.InvalidKMSKey.InvalidState error.
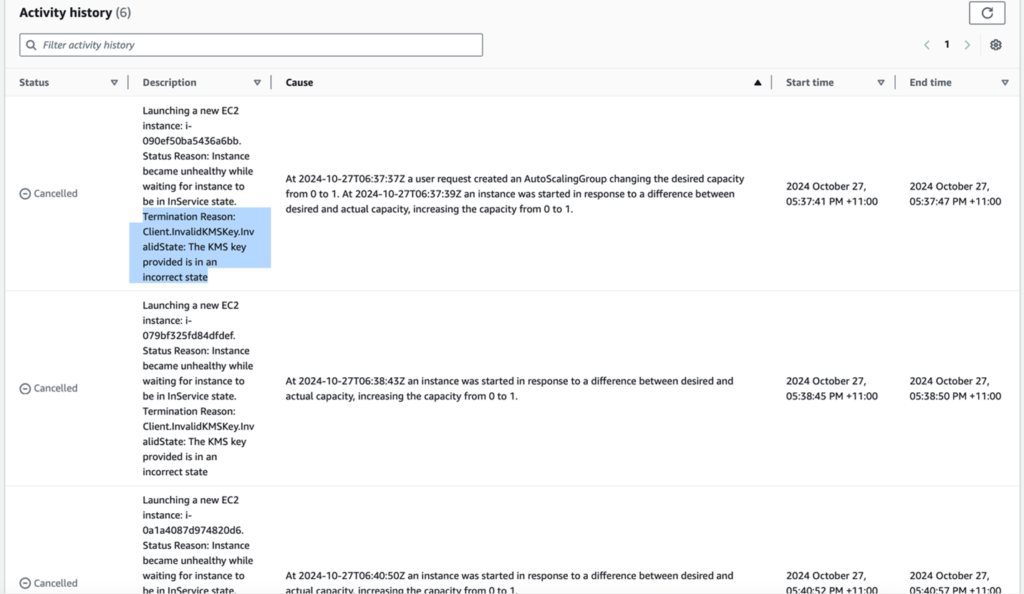
Don’t panic, the issue is with the KMS key policy. The Auto Scaling Service service-linked role needs specific permissions.
Part 5: Modifying the KMS Key Policy for ASG
In the source account ID 111111111111, update the blog/cmk-ebs key policy to allow the target account’s ASG service role to use the CMK. Replace everything with this policy:
					{
  "Version": "2012-10-17",
  "Id": "key-consolepolicy-3",
  "Statement": [
    {
      "Sid": "Enable IAM User Permissions",
      "Effect": "Allow",
      "Principal": {
        "AWS": "arn:aws:iam::111111111111:root"
      },
      "Action": [
        "kms:Create*",
        "kms:Describe*",
        "kms:Enable*",
        "kms:List*",
        "kms:Put*",
        "kms:Update*",
        "kms:Revoke*",
        "kms:Disable*",
        "kms:Get*",
        "kms:Delete*"
      ],
      "Resource": "*"
    },
    {
      "Sid": "Allow service-linked role use of the customer managed key",
      "Effect": "Allow",
      "Principal": {
        "AWS": "arn:aws:iam::111111111111:role/aws-service-role/autoscaling.amazonaws.com/AWSServiceRoleForAutoScaling"
      },
      "Action": [
        "kms:Encrypt",
        "kms:Decrypt",
        "kms:ReEncrypt*",
        "kms:GenerateDataKey*",
        "kms:DescribeKey"
      ],
      "Resource": "*"
    },
    {
      "Sid": "Allow attachment of persistent resources",
      "Effect": "Allow",
      "Principal": {
        "AWS": "arn:aws:iam::222222222222:role/aws-service-role/autoscaling.amazonaws.com/AWSServiceRoleForAutoScaling"
      },
      "Action": "kms:CreateGrant",
      "Resource": "*",
      "Condition": {
        "Bool": {
          "kms:GrantIsForAWSResource": "true"
        }
      }
    },
    {
      "Sid": "Allow use of the key",
      "Effect": "Allow",
      "Principal": {
        "AWS": "arn:aws:iam::222222222222:root"
      },
      "Action": [
        "kms:Encrypt",
        "kms:Decrypt",
        "kms:ReEncrypt*",
        "kms:GenerateDataKey*",
        "kms:DescribeKey"
      ],
      "Resource": "*"
    },
    {
      "Sid": "Allow service-linked role use of the customer managed key",
      "Effect": "Allow",
      "Principal": {
        "AWS": "arn:aws:iam::222222222222:role/aws-service-role/autoscaling.amazonaws.com/AWSServiceRoleForAutoScaling"
      },
      "Action": [
        "kms:Encrypt",
        "kms:Decrypt",
        "kms:ReEncrypt*",
        "kms:GenerateDataKey*",
        "kms:DescribeKey"
      ],
      "Resource": "*"
    },
    {
      "Sid": "Allow attachment of persistent resources",
      "Effect": "Allow",
      "Principal": {
        "AWS": "arn:aws:iam::2222222222222:role/aws-service-role/autoscaling.amazonaws.com/AWSServiceRoleForAutoScaling"
      },
      "Action": "kms:CreateGrant",
      "Resource": "*",
      "Condition": {
        "Bool": {
          "kms:GrantIsForAWSResource": "true"
        }
      }
    },
    {
      "Sid": "Enable IAM User Permissions",
      "Effect": "Allow",
      "Principal": {
        "AWS": "arn:aws:iam::2222222222222:root"
      },
      "Action": "kms:*",
      "Resource": "*"
    }
  ]
}
The policy does the following
- The key policy grants the EC2 Auto Scaling service-linked role permissions to use a customer-managed KMS key for tasks such as encrypting, decrypting and creating data keys.
- Cross-account access is enabled by first modifying the key policy to allow an external account access.
Return to the target account with ID 222222222222 and open the CloudShell. Enter the following commands to set up the necessary variables and create a grant:
					AWS_REGION=ap-southeast-2
ACCOUNT_ID_111111111111_AMI_KMS_ARN=arn:aws:kms:ap-southeast-2:111111111111:key/abc123
ACCOUNT_ID_222222222222_AWSServiceRoleForAutoScaling_ARN=arn:aws:iam::222222222222:role/aws-service-role/autoscaling.amazonaws.com/AWSServiceRoleForAutoScaling

aws kms create-grant \
--region $AWS_REGION \
--key-id $ACCOUNT_ID_111111111111_AMI_KMS_ARN \
--grantee-principal $ACCOUNT_ID_222222222222_AWSServiceRoleForAutoScaling_ARN \
--operations "Encrypt" "Decrypt" "ReEncryptFrom" "ReEncryptTo" "GenerateDataKey" "GenerateDataKeyWithoutPlaintext" "DescribeKey" "CreateGrant"

ACCOUNT_ID_111111111111_AMI_KMS_ARN is the ARN of the blog/cmk-ebs in the source account.
ACCOUNT_ID_222222222222_AWSServiceRoleForAutoScaling_ARN is the ARN of the Autoscaling group service role in the target account.
This command creates a grant that allows the external Auto Scaling role to utilise the KMS key, ensuring secure and controlled key usage across accounts.
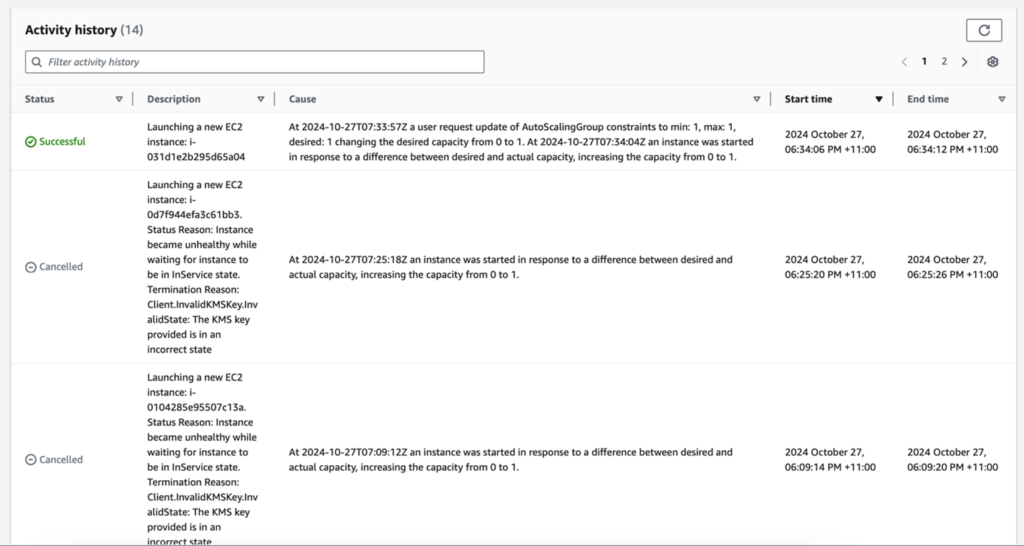
After executing the command, check the Activity tab in the Auto Scaling Group (ASG). You should see that an EC2 instance has been launched successfully.
Conclusion
Encrypting an EBS volume in an AMI before sharing it provides substantial security advantages, ensuring that only accounts with proper permissions to the CMK can decrypt the data. This setup keeps your information safe during cross-account transfers, aligning with data protection best practices.
At Cevo, we’re here to support your AWS security needs. From assessments to full infrastructure setup, we help organisations safeguard their assets and maintain compliance effortlessly. Let us help enhance your AWS security framework today.
For further details on AWS KMS and Auto Scaling key policies, refer to the AWS official documentation.
Don’t forget to clean up the resources you’ve utilised to avoid incurring unnecessary costs.
Warren is an experienced IT Consultant with over 15 years in Cloud and Software Engineering across APAC. At Cevo, he helps clients design and optimise AWS Cloud Solutions, driving innovation and scalability across marketplace, wayfinding, finance, insurance, fitness, and more through modern, cloud-native architectures.


