E2E Introduction
End-to-End (E2E) testing is a software testing methodology that primarily examines an application’s workflow from start to finish, ensuring the system’s seamless operation. The goal of this type of testing is to verify the appropriate interactions between system dependencies and ascertain that the entire application performs correctly in real software and network environments.
Why should you conduct E2E testing?
- Detecting system-level issues: E2E testing can simulate actual user interactions, helping to identify system-level problems, such as functional defects, integration errors, performance issues, etc.
- Validating system processes: E2E testing verifies whether the entire system’s processes function as expected, ensuring coordination and proper data flow between different components.
- Improving user experiences: It ensures the system’s interaction and experience meets expectations across different user scenarios.
- Ensuring system stability: It assists in capturing potential stability problems and errors, ensuring system stability and reliability under long-run operations and load conditions.
- Supporting Continuous Integration and Deployment (CI/CD): E2E testing can be incorporated into the CI/CD process, acting as a part of verifying system integrity. It ensures the system remains functional after each code change.
In contrast to unit and integration tests, which hone in on individual components or interactions within an application, end-to-end (E2E) testing adopts a more holistic view. It assesses the entire system from the vantage point of the user, encapsulating everything from user interface and API interactions to data processing and real-world user actions. Given their expansive remit – simulating authentic user behaviours and confirming the seamless operation of intricate, system-wide processes – E2E tests typically command a more substantial allocation of resources and time.
Consequently, the planning of a testing strategy necessitates careful consideration of the project’s size, intricacy, and schedule. Such an assessment will guide the decision on whether to incorporate E2E testing, and if so, how to calibrate its scope and frequency for optimal results.
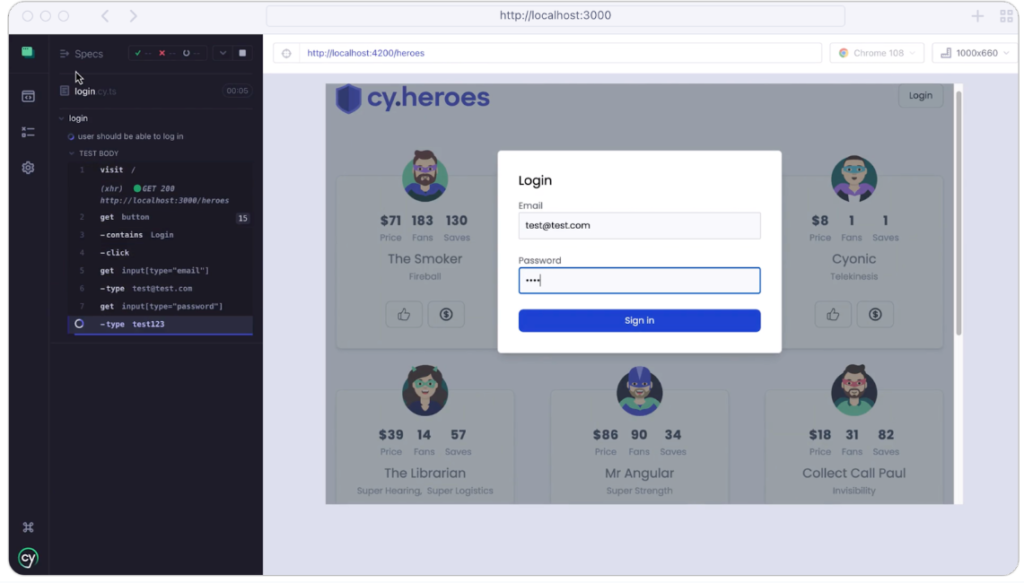
In this blog, we’re going to delve into the world of E2E testing with a focus on a powerful tool – Cypress. We’ll explore its setup and configuration, understand how to get started, and discuss its overall benefits. Additionally, we’ll cover different ways to run tests using Cypress, providing a comprehensive understanding of this tool.
Common Tools for E2E testing
Note, the specific tool and process choice depends on the project requirements, team’s tech stack, and preferences. Different tools and frameworks vary in syntax, API, and functionality, so the most appropriate tool should be chosen based on the project’s specific requirements.
In the JavaScript environment, there are numerous tools for conducting E2E testing. Here are some of the common ones for React projects:
1. Puppeteer
Puppeteer: This is a Node library provided by the Google Chrome team. It offers a set of APIs to interact with Chrome or Chromium browsers through the DevTools protocol. Puppeteer has a broad scope, including generating page screenshots and PDFs, crawling SPA applications, and it can construct a complete E2E testing solution.
Advantages ✅:
- Powerful Node library for browser automation
- Ability to interact with Chrome or Chromium browsers through the DevTools protocol.
Disadvantages ❌:
- Relatively slow test execution speed due to browser manipulation
- Configuration and usage complexity, especially for non-Node.js or DevTools users
2. Playwright
Playwright: A cross-browser automation tool similar to Puppeteer, but it supports multiple browsers, including Chrome, Firefox, and Safari.
Advantages ✅:
- Cross-browser support for Chrome, Firefox, and Safari
- Similar capabilities to Puppeteer, but with multi-browser support
Disadvantages ❌:
- Being a newer tool, it may have less mature tooling and community support compared to others
3. Selenium WebDriver
Selenium WebDriver: Can simulate all user operations on a webpage and supports various programming languages and browsers. WebDriver IO is a JavaScript testing framework built based on Selenium and Node.js.
Advantages ✅:
- Simulates user operations on webpages
- Supports multiple programming languages and browsers
Disadvantages ❌:
- Requires configuration and setup of browser drivers
- Handling complex waits and asynchronous operations can increase code complexity
4. Cypress
Cypress: Allows for the writing of tests that run in a real browser environment with simple and intuitive syntax. It supports features like automatic waiting and real-time reloading. We chose Cypress for its user-friendly API, its powerful yet easy-to-use testing capabilities, and its ability to perform real browser interactions, which make it a great fit for end-to-end testing.
Advantages ✅:
- Real browser environment for testing
- Intuitive and easy-to-use syntax
- Automatic waiting and real-time reloading
- Great community support
Disadvantages ❌:
- Only the following browser versions are supported:
Chrome 80 and above
Edge 80 and above
Firefox 86 and above. - Test execution speed may be affected by browser performance
Cypress - Configuration
Getting Started
Related libraries:
- cypress – main underlying tool/lib used to implement and run E2E tests.
- @testing-library/cypress – provides robust methods for querying elements.
- @faker-js/faker – used to assist with random mock data generation.
To begin, install Cypress via npm or yarn:
npm install cypress —save–dev |
or
yarn add cypress –dev |
Once the installation is complete, Cypress can be opened using the following command:
npx cypress open
|
Upon the first run, Cypress will create a directory named cypress in the root of your project. This directory includes various example tests and some configuration files.
Project Structure
- cypress/integration – for test files ending in *.spec.js|ts (organised by domain)
- cypress/plugins – entry point for extending Cypress behaviour and registering tasks.
- cypress/support – entry point for registering custom Cypress commands and overrides.
Configuration Files
Cypress’s configuration revolves around two files: cypress.json and cypress.env.json. The former contains general configuration, while the latter is used for environment-specific settings.
cypress.config.ts
Configuration | Cypress Documentation
setupNodeEvents | Configuration | Cypress Documentation: on and config
The cypress.config.ts file is created in the root of your project. Here, you can specify global configuration settings. For example:
|
import { defineConfig } from ‘cypress’ |
- chromeWebSecurity: Cypress, by default, enforces constraints on cross-domain testing, courtesy of the same-origin policy. However, if your test scenario involves redirection between disparate domains, it’s necessary to disable this setting.
- setupNodeEvents: This function allows you to register event handlers to monitor and react to a range of Node.js events during the Cypress runtime before tests are executed.
Use cases include:
– Extending the functionality of Cypress by registering custom tasks or plugins.
– Carrying out additional steps such as initiating a mock server or setting up test data, in preparation for running your tests.
cypress.env.json
The cypress.env.json file stores environment-specific variables that may vary across different environments such as staging or production. This may include API keys, user credentials, etc.
{
|
This file provides the environment variables for your CI/CD pipeline setup and should not be committed to version control, perhaps you might want to include this in your project’s .gitignore file.
Cypress - Running
Official Documentation | https://docs.cypress.io/guides/guides/command-line#cypress-run |
Running Tests in the Browser
cyopen: Convenient for debugging, comprehensive error messages
The `cyopen` command is particularly suitable for local development and debugging. It opens the interactive test runner interface of Cypress, providing a more intuitive experience for your end-to-end testing. For example, when writing tests and debugging locally in a personal environment, you might use the following command: `“cyopen:personal”: “APP_ENV=personal npm run cyopen”` from package.json. In this case, the value of `APP_ENV` needs to be set according to the actual use case of your project. For instance, in a local environment, it might be set as `personal` or `local`.
However, the `cyopen` command might not be the best choice for Continuous Integration/Continuous Deployment (CI/CD) environments. This command requires a graphical interface and is more interactive, which doesn’t align with the principles of automated and non-interactive testing typically found in CI/CD environments. In CI/CD environments like GitHub Actions, `cyrun` would be a more suitable choice as it supports automated test runs.

Running Tests in Command Line
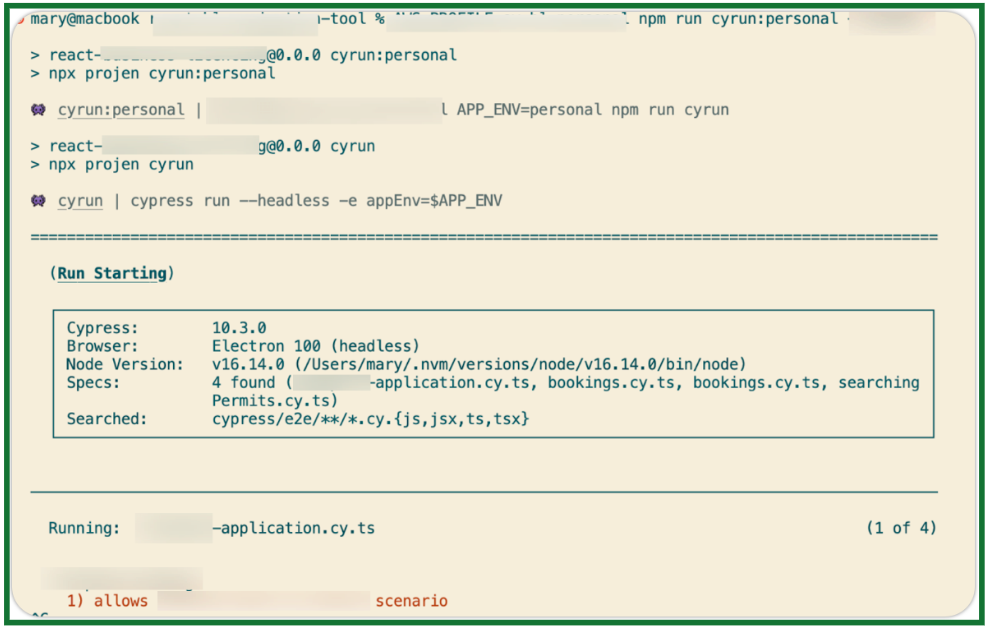
cyrun:Quick, but error messages may not be accurate (not actual failures)
- Encapsulated command in the package.json:
- In your CI/CD pipeline it can be run using the command: “cyrun”: “cypress run –headless -e appEnv=$APP_ENV”
- In personal environment to write tests and debug locally: “cyrun:personal”: “APP_ENV=personal npm run cyrun”
- Again: Please note that the value of APP_ENV needs to be set according to the actual usage of your project. For example, in a local environment, it might be set as personal or local.

To Wrap It Up
E2E testing, which replicates real user behaviours and provides thorough test coverage, serves as a vital safeguard for the flawless operation of applications from start to finish. This anticipatory approach helps detect system-level issues early on, thus avoiding more expensive repairs down the line.
Opting for Cypress as your go-to E2E testing tool is an astute choice. It outshines its competitors thanks to its distinctive features such as live reloading, time-travel functionalities, automatic waiting, and dependable results, which altogether earn it a favoured spot among developers.
Check out Part 2, where we delve deeper into the remarkable capabilities that Cypress brings to the table. Here’s to successful testing!


