In the early days of cloud infrastructure, accessing servers often required direct connections, such as SSH for Linux and RDP for Windows. These connections typically went through public subnets, requiring security hardening measures like IP whitelisting. This approach meant exposing servers to the internet and managing complex firewall configurations.
However, AWS Session Manager now offers a modern, secure way to connect to instances without the need for open ports, public IPs, or even SSH keys.
This updated blog builds on a previous post by Cevo, covering the latest features of AWS Session Manager for improved security and simplicity.
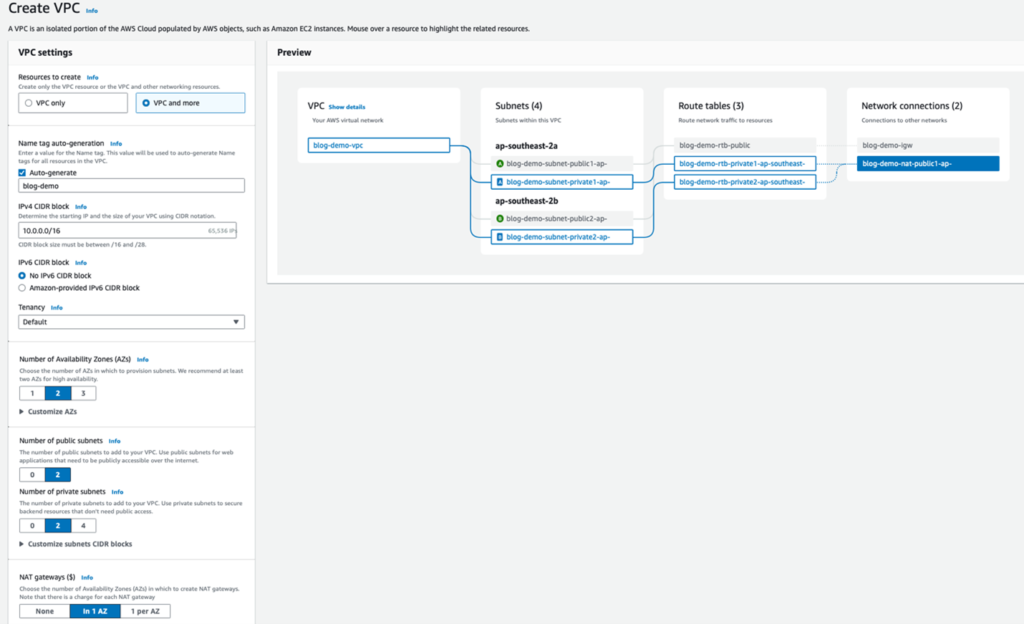
Step 1: Setting Up the VPC

We’ll begin by creating a new VPC, where our EC2 instance (acting as a bastion host) will reside in a private subnet. For this setup, a NAT gateway is required for the SSM agent to access AWS services via HTTPS on port 443. Alternatively, you can configure VPC endpoints to eliminate the need for a NAT gateway (Learn more).
Step 2: Configuring the IAM Instance Profile Role
After setting up the VPC, create an IAM role to grant the EC2 instance permissions to use AWS Systems Manager.
Navigate to the IAM Roles Console: Choose Create Role and follow these steps.
1. Select Trusted Entity Type: Choose AWS service and select EC2 from the service dropdown.

2. Assign Permissions: Double check that AmazonSSMManagedInstanceCore is added.

3. Name Your Role: Add a descriptive name, such as BastionEC2SSMRole, and finalise the role creation.

Step 3: Launching the EC2 Instance
In the EC2 console, launch a new instance with the following settings:
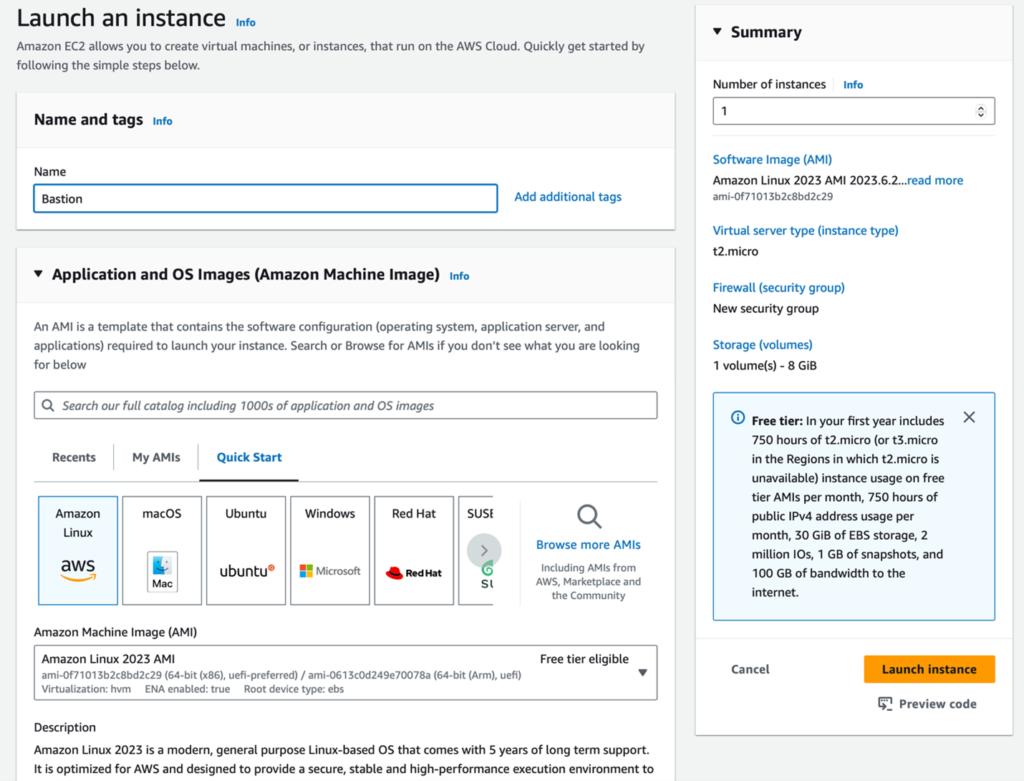
1. Instance Details: Name your instance (e.g., Bastion) and choose Amazon Linux 2023 AMI. Amazon Linux AMIs come pre-installed with the SSM agent, configured to start on boot. See Supported Operating Systems and SSM agent in Windows Server.

2. Instance Type: Choose an appropriate instance type, such as t2.micro, and proceed without a key pair. [1] See right sizing bastion host considerations.

3. Network Settings: Select the VPC and private subnet you created earlier, disable public IP assignment, and create a new security group with no inbound rules.

4. Storage Encryption (Optional step, read my blog on how to launch an encrypted AMI in AWS Auto Scaling Group): Enable EBS volume encryption for additional security by selecting Encrypted in the dropdown and specifying a KMS key blog/cmk-ebs, if applicable.


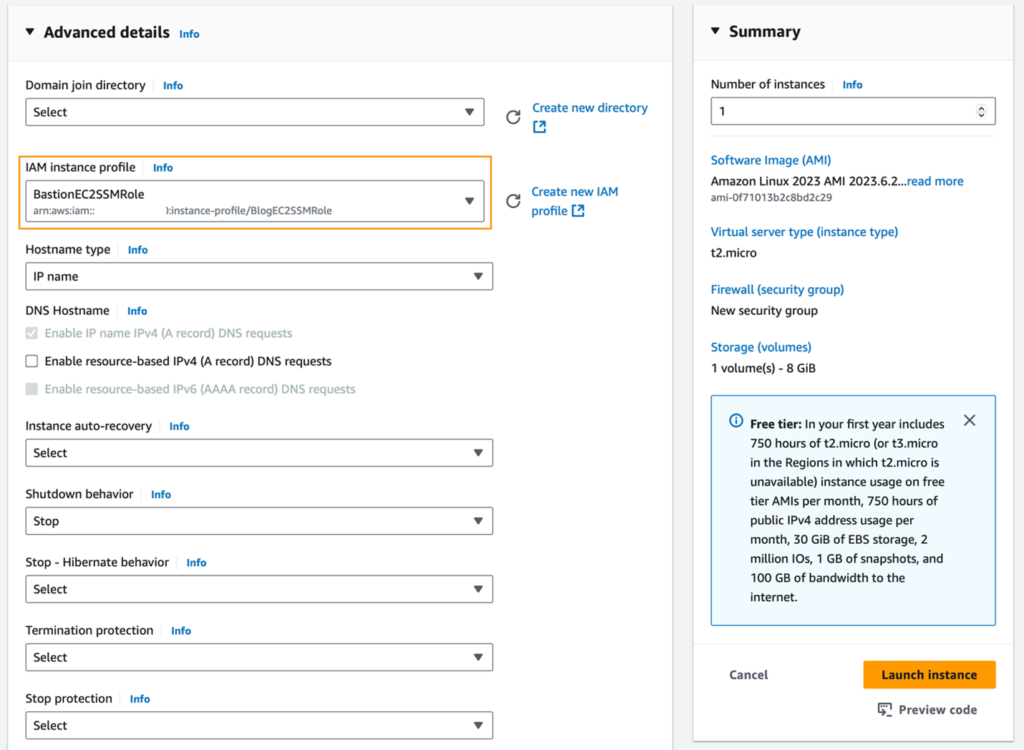
5. IAM Role Assignment: In Advanced Details, attach the BastionEC2SSMRole instance profile to enable Session Manager access.

Launch your instance, and once it’s ready, you’ll be able to connect using Session Manager.
Step 4: Connecting via AWS Session Manager
Once the instance is running, follow these steps to connect:
- Select Your EC2 Instance: Navigate to the Connect option in the instance details.
- Session Manager: Choose the Session Manager tab and click Connect to open a terminal window within your browser. This console allows you to manage your instance securely, with no need for SSH or public-facing access.


3. Aside from accessing your server from the AWS console, you can connect to your EC2 server from your laptop and even do a port forwarding to connect to another EC2 within the VPC or even to an RDS instance. Head here to learn more.
4. To further enhance security, consider encrypting your sessions with AWS Key Management Service (KMS). For detailed guidance, refer to the AWS documentation on session encryption with KMS.
Benefits of AWS Session Manager
By using Session Manager, you gain several advantages:
- Enhanced Security: No open ports or public IPs are required, minimising attack surfaces.
- Access Control & Logging: IAM-based access control and detailed CloudTrail logs provide centralized permissions and accountability.
- Operational Efficiency: No SSH key management is needed. Both Linux and Windows are supported, accessible through AWS Console or CLI.
- Secure Data Transfer: Session data is TLS-encrypted, with optional private VPC Endpoints for added security.
- Cost Savings: Reduces costs by eliminating bastion hosts and internet data transfer fees.
At Cevo, we’re dedicated to enhancing your cloud infrastructure’s security and up-lift your team’s operational maturity. We provide tailored solutions, including comprehensive security assessments and remediation services, whether your environment is on-premises or within AWS. Let us help you strengthen your security posture and protect your critical cloud resources effectively.
Don’t forget to clean up the resources you’ve utilised to avoid incurring unnecessary costs.
[1] When choosing an EC2 instance type for a bastion host, consider the specific tasks the host will perform. For a standard bastion host, where the main function is to manage secure SSH access to resources in private subnets, a lightweight instance (such as a t3.micro) is generally sufficient. These instances are cost-effective and offer enough resources to handle intermittent access needs without over-provisioning. However, if the bastion host needs to handle additional processing tasks—like report generation, image processing, or data-intensive operations—it will require more substantial resources like CPU, memory, storage, network bandwidth or even resiliency and high availability.
Warren is an experienced IT Consultant with over 15 years in Cloud and Software Engineering across APAC. At Cevo, he helps clients design and optimise AWS Cloud Solutions, driving innovation and scalability across marketplace, wayfinding, finance, insurance, fitness, and more through modern, cloud-native architectures.


